Ajax Functional Testing Fun | March 12th, 2008
It seems that no matter how much you look for information about Eclipse and how to setup different types of projects, your version Eclipse is innevitably not the same version of the person who makes the tutorial and nor are you as much of an Eclipse geek as the writer of the tutorial. The same things will probably be thought about what follows ![]()
First of all I am doing this in Eclipse 3.3 WTP.
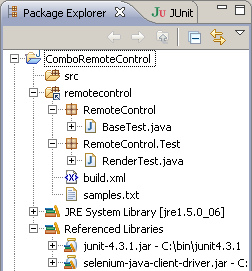
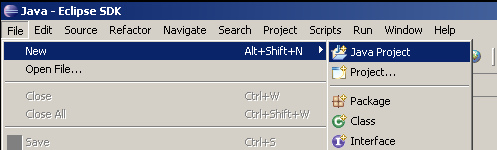
I started by creating a new Java project.
Which should have resulted in a basic project that looks something like this.

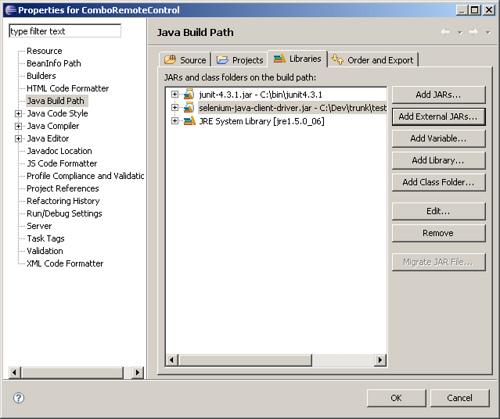
Then right click on the project root and choose “Properties” from the context menu (Alt+Enter). Go to the “Java Build Path” section of the properties. There you can include source files from elsewhere on your computer - so for example if you keep your test code elsewhere on your system you can include the source folder which will include your Java files in the Java project so that they can be built and run as a Java program while still keeping the files in your source control folder as well. This way you also avoid checking in Java projects all over the place that are useless for everyone else.
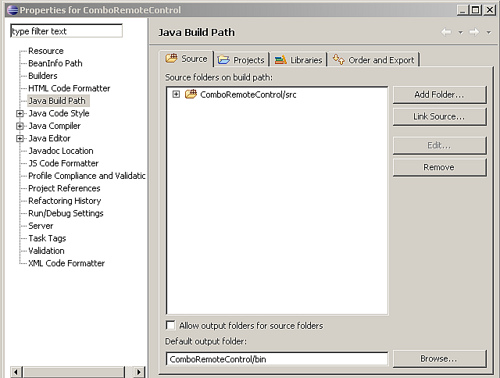
Now we add some external Jars. Find the Selenium Java client Jar and the JUnit Jar on your system and add them.
Now your project should be ready to go and you can create Selenium tests using the Java API and run them from Eclipse using JUnit. How sweet it is!