Getting Started with Dreamweaver Extensions
This tutorial will show you how to install the Dreamweaver Extensions and quickly add components to your page.
Installation
In the tools folder of your Complete UI, you should find the nitobi_cui.mxp file that will install your Dreamweaver Extensions. When the installation is complete, you can check the Adobe Extension Manager to see that the installation has worked correctly.
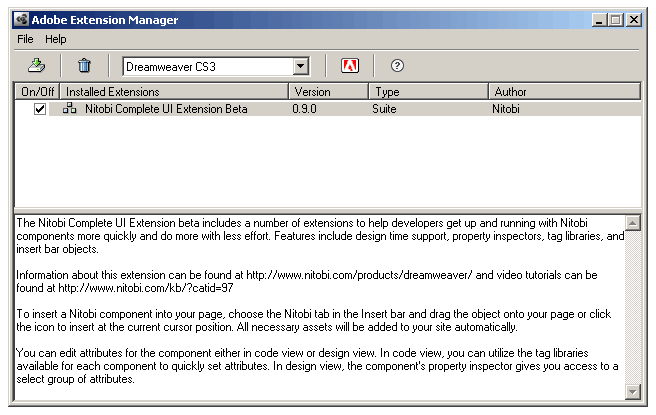
Now when you open Dreamweaver, you should see the Nitobi extensions included in the Insert toolbar - if you select the Nitobi tab, you can find buttons for inserting each of the eight components.

Inserting a Component
You will need a saved file to insert Nitobi components: either a page you have already worked on, or a new page that you'll save before inserting a component. You can either click on one of the buttons or drag it into place in Design View. I'm going to insert a Calendar, which is the simplest of our components to start with. Inserting a Calendar into your page starts the Calendar insertion wizard.
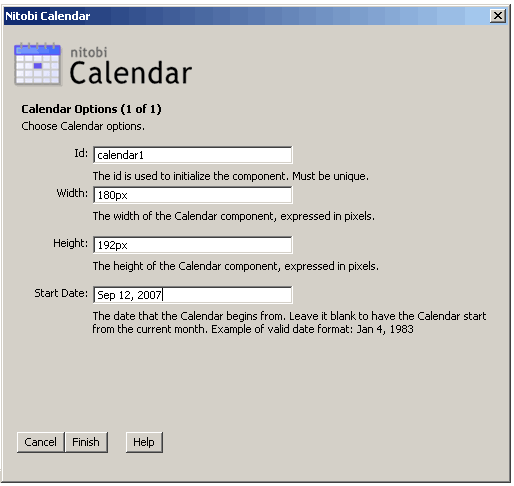
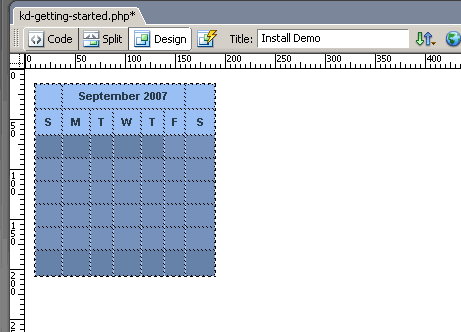
You will need to give the Calendar a unique id, so the Javascript can load the component correctly. The other fields are optional - if you leave them empty, default values are inserted. You can now see a preview in Design View of how the calendar will appear in your page.
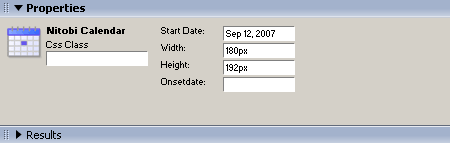
At the bottom of the screen, you can access the Calendar's properties through the Properties Inspector. As well as changing the Width, Height and StartDate attributes, you can also specify a CSS Class (either one you have defined yourself, or one from the Nitobi stylesheet), and any Javascript behaviour to attach to the Onsetdate event.
If you switch to Code View, you can see that the extensions have automatically set up your page to include Nitobi components: the xml namespace is set in the html tag, the stylesheets and script files are linked, and the "calendar1" component is loaded when the page is initially.
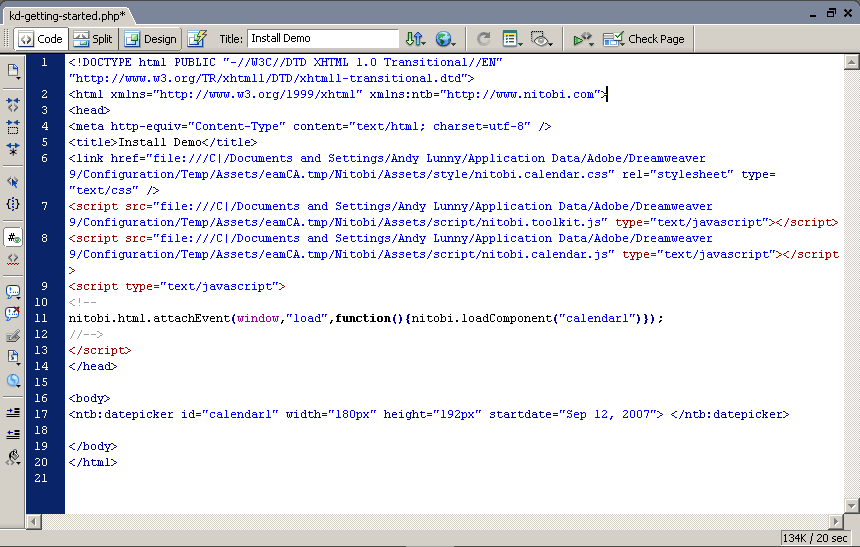
At the moment, the stylesheets and script files are linked to locations on the local hard drive. When you save your file, Dreamweaver will prompt you to move these dependent files to a folder on your site. Whenever you use a different component on your site, the relevant stylesheets and script files are moved onto your site.
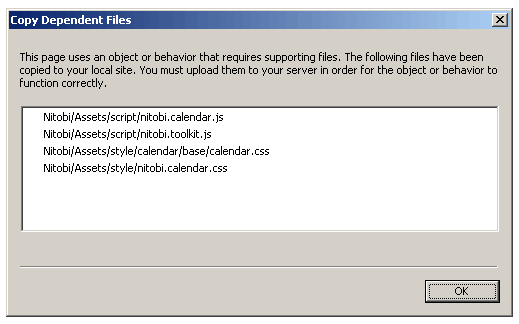
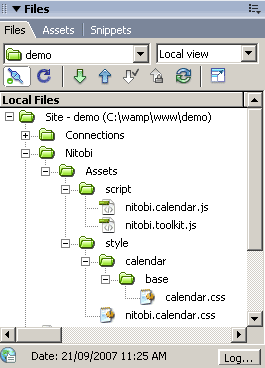
Once the files have been copied over, you can check that they have been copied correctly by looking at your site directories in the lower-right hand corner of the screen.
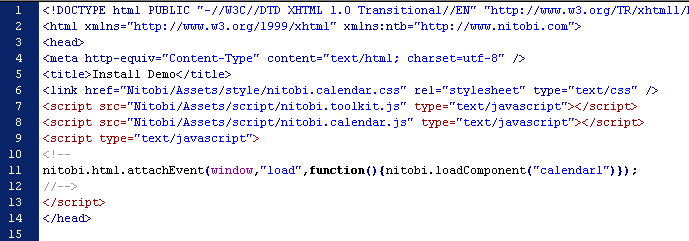
The references on your page are then automatically updated.
You can now preview your component in a web browser by hitting F12.
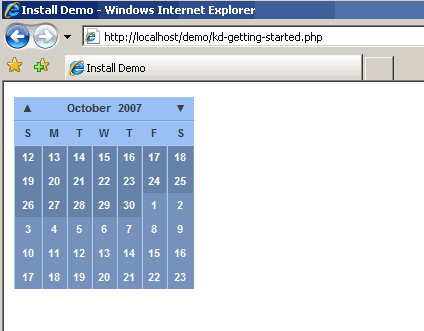
Congratulations - you've just inserted your first Nitobi component!
Comments:
|
Note: This article was taken from the Nitobi knowledgebase. To search the knowledgebase, go to http://www.nitobi.com/kb/. |